After many years helping homeowners and contractors improve their outdoor lighting solutions, I’ve realized one thing: the right installation process makes all the difference. At Landsign, we design solar wall lights that not only look great but are also easy to install, energy-efficient, and built to last in all weather conditions. Whether you’re lighting a garden path, balcony, fence, or patio wall, understanding how to install them correctly ensures maximum performance and longer lifespan.
What makes solar wall lights different
What tools and materials you’ll need before installation
Step-by-step installation instructions
Technical specifications of Landsign solar wall lights
Common installation mistakes and how to avoid them
FAQs about solar wall lights
How to get support and contact us
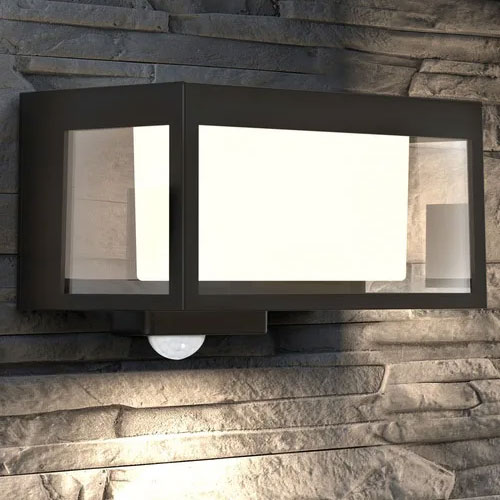
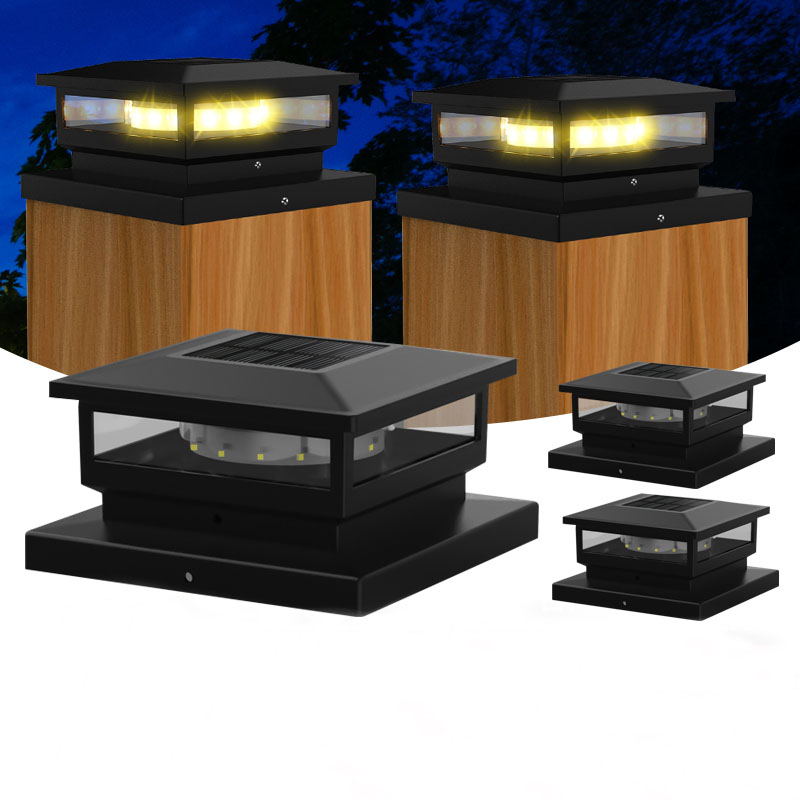
In my experience, the biggest advantage of solar wall lights is their simplicity and cost savings. They don’t require wiring, they use renewable energy, and they can be mounted almost anywhere with sufficient sunlight. Here’s why so many customers choose them:
Energy Efficiency – Powered entirely by sunlight, they automatically charge during the day and light up at night.
Zero Electricity Cost – No wiring or power bills.
Eco-Friendly Design – Reduce carbon emissions while keeping your outdoor area bright.
Weather Resistance – Designed to withstand rain, heat, and frost.
Low Maintenance – Once installed, they practically take care of themselves.
Before installing, gather the following tools:
Electric drill or screwdriver
Anchors and screws (included in Landsign package)
Level ruler (for perfect alignment)
Measuring tape
Pencil or marker for drilling spots
Pro tip from my own installs: always test the solar wall lights in sunlight before mounting them permanently. This ensures the panels are charging properly.
The placement determines how effectively your solar wall lights perform. Here are my personal guidelines:
| Factor | Recommendation | Why It Matters |
|---|---|---|
| Sunlight Exposure | Install where panels receive at least 6 hours of direct sunlight daily | Ensures full charge and longer nighttime illumination |
| Mounting Height | 1.8–2.5 m above the ground | Provides balanced brightness and wide coverage |
| Shading | Avoid installation under trees, roofs, or ledges | Shadows reduce charging efficiency |
| Angle & Direction | Face the panel southward (in northern hemisphere) | Maximizes sunlight capture |
| Weather Protection | Ensure good sealing around screws | Prevents water leakage into the light housing |

I’ve installed hundreds of units, and this method has proven reliable every time:
Unpack and Inspect – Make sure all parts are included (light body, screws, anchors, user manual).
Charge Before Use – Place the lights under sunlight for 8–10 hours to activate the battery.
Mark the Mounting Holes – Use a pencil to mark where you’ll drill based on the mounting bracket.
Drill and Secure Anchors – Drill holes according to the markings, then insert wall anchors.
Attach the Bracket or Fixture – Screw the light base firmly to the wall.
Adjust the Panel Angle (if applicable) – For adjustable models, tilt the panel toward sunlight.
Switch On and Test – Turn on the light (check “ON/OFF” switch or light sensor). The light should automatically illuminate at dusk.
Below is a quick look at the standard features of Landsign Solar Wall Lights:
| Parameter | Specification | Notes |
|---|---|---|
| Solar Panel | 5.5 V 1.5 W Monocrystalline Silicon | High-efficiency panel for faster charging |
| Battery Type | 3.7 V 2200 mAh Lithium-ion | Provides 8–12 hours illumination per charge |
| LED Quantity | 20 – 100 PCS (varies by model) | Energy-saving, high-brightness output |
| Color Temperature | 3000 K – 6000 K | Warm to cool white options |
| Material | ABS + Aluminum Alloy | Durable and corrosion-resistant |
| Lighting Modes | Dim, Sensor, Motion-activated | Smart lighting for energy efficiency |
| Waterproof Rating | IP65 | Resistant to rain and dust |
| Charging Time | 6–8 hours (under full sun) | Based on average sunlight exposure |
| Working Time | 8–12 hours | Auto on/off at dusk and dawn |
These technical details are part of what make Landsign’s products stand out in the market—we balance brightness, longevity, and design.
Even experienced installers can make small errors that affect performance. Here’s what to watch for:
Wrong Placement – Installing under shade or in indirect sunlight drastically reduces charging efficiency.
Not Charging Before Use – Always let the unit charge for at least 8 hours before the first night.
Loose Mounting – A shaky bracket can cause misalignment or fall during heavy wind.
Ignoring the ON/OFF Switch – Some models require manual activation before first use.
Incorrect Angle – Solar panels that face away from sunlight charge poorly.
Taking a few extra minutes to double-check positioning and stability ensures long-term success.
Maintenance is simple, but regular attention improves longevity. Based on my own testing:
Clean the Solar Panel Monthly – Dust and debris can block sunlight; use a damp cloth.
Inspect the Screws Every Season – Tighten any loose fixtures, especially after storms.
Replace the Battery Every 1–2 Years – Lithium batteries wear naturally over time.
Store Indoors During Harsh Winters – If you experience freezing temperatures below -10 °C, temporary removal can help.

Q1: Do I need to turn the lights on every night?
No, Landsign solar wall lights automatically turn on at dusk and off at dawn.
Q2: Can I install them on wooden fences or concrete walls?
Yes, you can. Use the provided screws for wood or wall anchors for concrete or brick.
Q3: How long will they last before needing replacement?
Most units last 3–5 years depending on environmental conditions and maintenance.
Q4: Will they still work on cloudy days?
Yes, though performance may be slightly reduced. The built-in battery stores enough energy from previous sunny days.
Q5: Can I use them indoors?
They are designed for outdoor use since they require sunlight to charge effectively.
From my professional view, solar wall lights are not just about illumination—they enhance safety, aesthetics, and property value. They create a warm, welcoming atmosphere for guests while improving security at night. Homeowners often mention how surprised they are by the brightness and design quality of Landsign products once properly installed.
If you’re looking to upgrade your outdoor lighting with a sustainable, cost-effective solution, Landsign solar wall lights are the right choice. We’ve built our reputation on quality, reliability, and customer satisfaction.
Let us help you choose the perfect model for your home or project. Contact us today for product catalogs, price quotes, or personalized installation guidance—we’re always here to assist.
Brighten your outdoors the smart way—with Landsign.

139th Canton Fair (Phase 1)
Time: April 15 – 19, 2026
Booth No:5.2M15
Welcome to visit our booth!